
Adding an API Key to Azure Mobile Apps with API Management
I’ve written in the past that API keys are not security. They do not authenticate the app or user and they are easily interceptable (or extracted from distributed mobile apps). Despite that, that are good for a bunch of things, including figuring out which version of the app is being run, and ensuring that a certain version of the app you are running is using a specific backend or a specific set of policies. API keys are useful. I’m continually asked to support API keys.
They are super-simple to add using Azure API Management. If you haven’t already, take a look at my three other posts:
- Creating an Azure API Management service
- Adding caching policies for Azure Mobile Apps
- Custom routing for Azure Mobile Apps
I’ll assume you have created an Azure API Management instance for the rest of this article. Now, how do I turn on API keys?
Step 1: Adjust API Settings
Open up your resource within the Azure portal, then select APIs, and finally, your API. Select the Settings tab. You will see something like this:
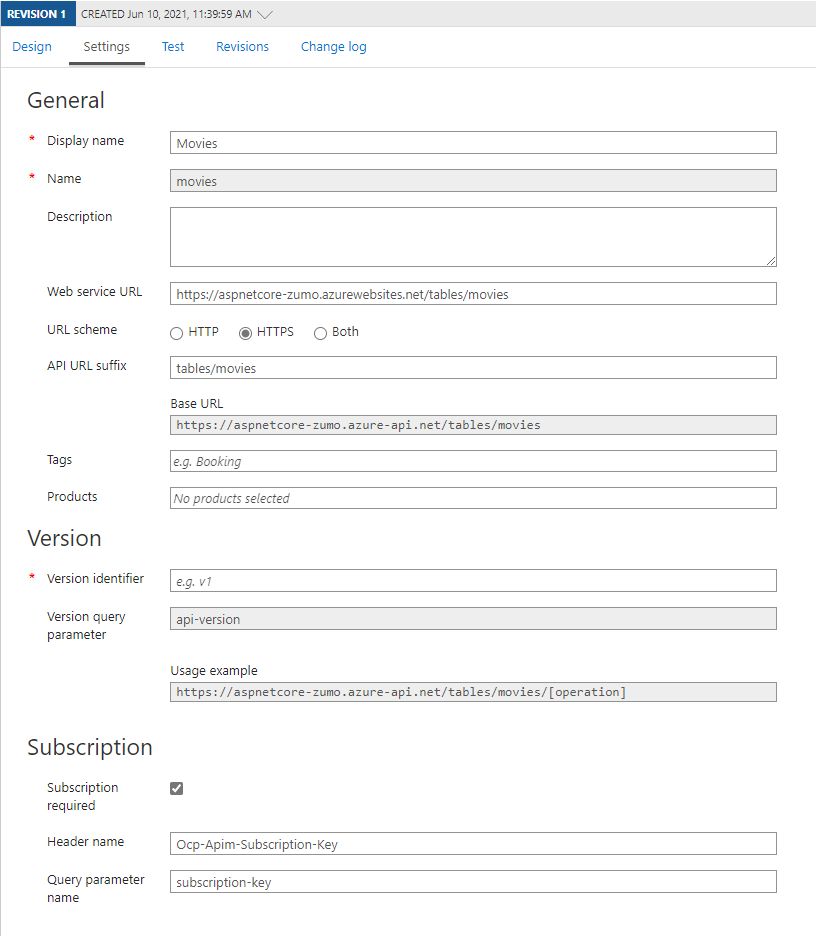
Note the Subscription section at the bottom. You will see that the Subscription is required and it gives the header name and query parameter for specifying the API key. You can change these. For example, I set mine so that they are both api-key - this makes it easy to remember. Don’t forget to press Save once you are done.
Step 2: Create a Subscription
Now, back on the left hand menu, select Subscriptions. There is already one subscription built-in. You can add another easily enough. Just press the Add subscription button at the top.
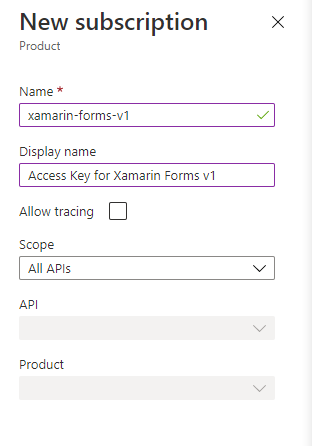
The name can only consist of alphanumeric and dash characters. The Display name, however, can be whatever you want. You can scope the API key to all APIs, a “Product” (which is a defined collection of APIs), or a specific API. I selected All APIs. Press Save when complete. To view the subscription keys, press the triple-dots on the right hand side, then select Show/hide keys. You can use the primary key or secondary key.
Step 3: Test with and without an API Key
There are several tools for doing ad-hoc REST calls. I use Postman, but there are others, including tools integrated into your IDE. In my first test (no API key), I’m going to GET https://aspnetcore-zumo.azure-api.net/tables/movies:
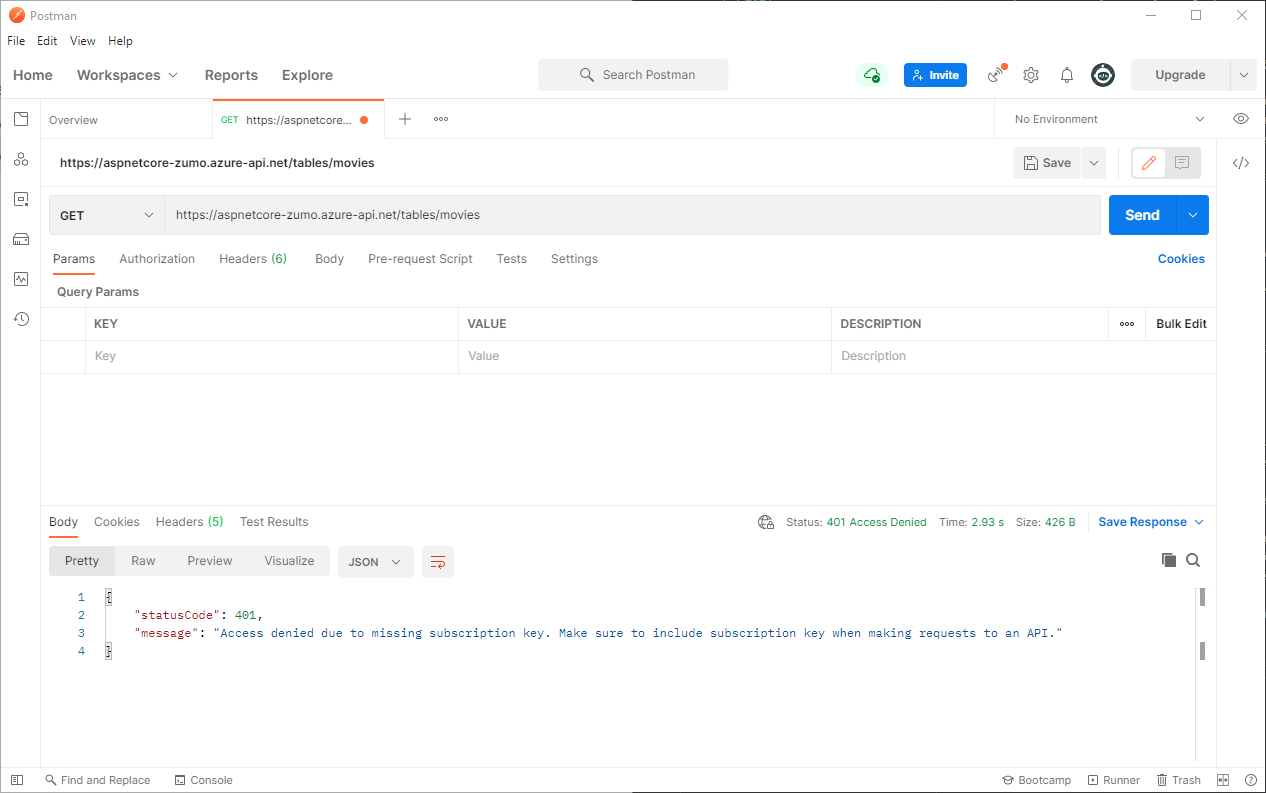
As you can see, you will get a 401 Access Denied message back, but it is well-formed JSON. You can also look at the headers. There will be a WWW-Authenticate header with the information you require. This allows you to distinguish between a wrong API key and a wrong username/password. Why is this important information? Remember you were given two keys? You can embed both keys into your app and fail over from one to the other if the first one doesn’t work. This allows you to rotate your keys when the primary key is compromised without affecting your users.
Now, what does a good request look like?
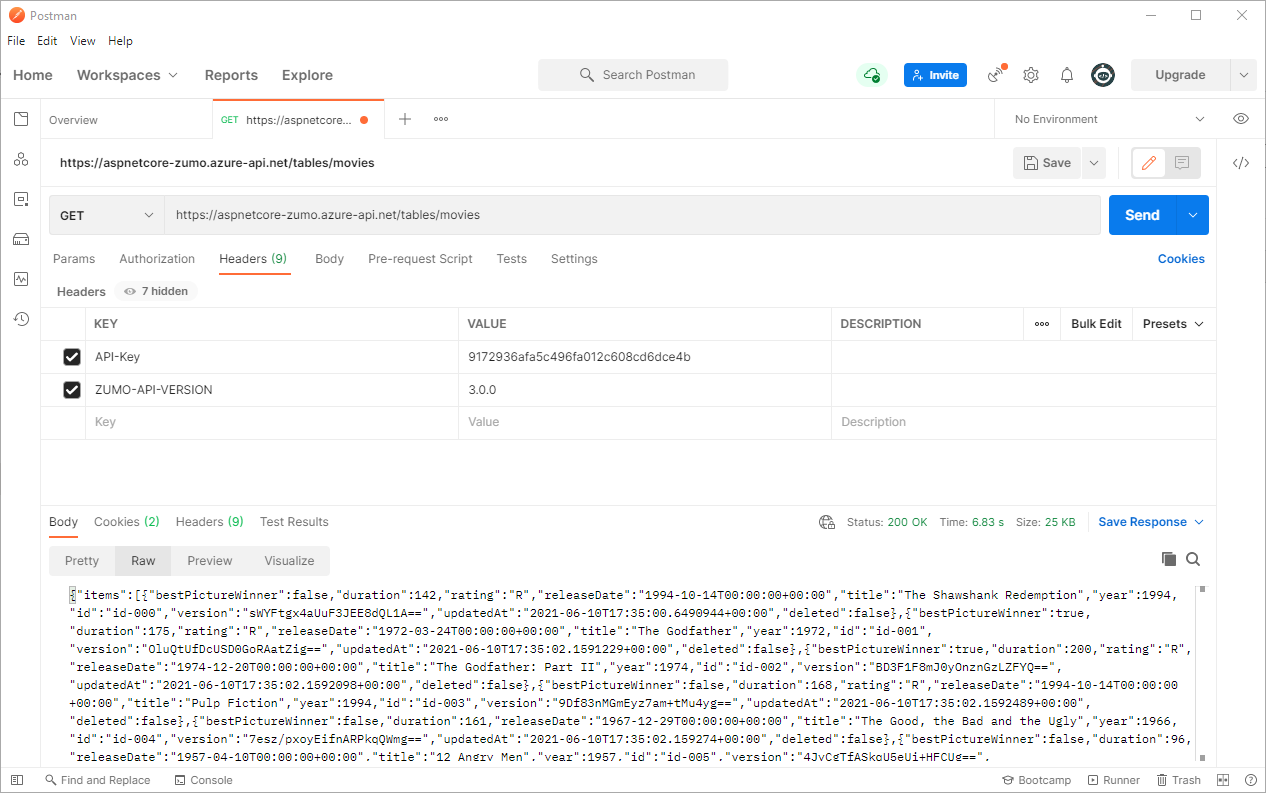
I’ve added the API-Key header alongside the ZUMO-API-VERSION header. The response is returned properly.
Step 4: Add the API Key to your Azure Mobile Apps client
We aren’t quite done yet. Azure Mobile Apps doesn’t understand API keys, so you have to tell it by adding a policy to the client. In .NET, a policy is a DelegatingHandler. Delegating handlers act as a pipeline - each one is given the chance to alter the request or do something with the response. A simple version to add the API key would be as follows:
public class ApiKeyPolicyHandler : DelegatingHandler
{
    private string _key;

    public ApiKeyPolicyHandler(string apikey)
    {
        _key = apikey;
    }

    protected override Task<HttpResponseMessage> SendAsync(HttpRequestMessage request, CancellationToken token)
    {
        request.Headers.Add("API-Key", _key);
        return base.SendAsync(request, token);
    }
}
It’s a little harder to handle two keys. You have to clone the request (including the body of the request), then add the API key before sending the request. If the response is 401 and the right WWW-Authenticate header is present, then clone again and add the second key.
To enable the ApiKeyPolicyHandler, update the way you create the client:
var client = new MobileServiceClient(Constants.BackendUrl, new ApiKeyPolicyHandler(Constants.ApiKey));
You can also stack policies:
var client = new MobileServiceClient(Constants.BackendUrl,
    new ApiKeyPolicyHandler(Constants.ApiKey), new LoggingPolicyHandler());
For more information on this, see the HOW-TO documentation. Each Azure Mobile Apps client library has a similar functionality, so if you happen to be writing in JavaScript, Kotlin, or Swift, check out the appropriate documentation for those client libraries.
Leave a comment