
Using API Management with Azure Mobile Apps
Over the years, I’ve been asked for several features within Azure Mobile Apps that I’ve been reluctant to support out of the box. Azure Mobile Apps provides a toolkit in the context of the Node.js and ASP.NET Framework environments, so you can - theoretically - provide a lot of this functionality yourself. You can also use external services to provide that functionality.
This is the start of a new series of blogs about Azure Mobile Apps, and my first foray into using Azure API Management to access Azure Mobile Apps. Azure API Management allows you to do all sort of useful things:
- Support API Keys
- Support versioning
- Support caching
- Restrict communication for better security
- Do pre-service request validation
- Integrate with PowerApps
… and a whole lot more. First, though, you have to set up Azure API Management. There are at least four ways to do this - through the portal, through Visual Studio Code, through ARM templates, and through Terraform. I won’t be discussing the other techniques - just the portal technique.
You need an Azure subscription
If you are going to use any Azure service, you need to have an Azure subscription. You can get 12 months of free services, and there are programs for startups and students separately.
Azure Mobile Apps uses Azure App Service and Azure SQL. Using the Central US region and the smallest production ready services will cost you approximately $55 to run. (Azure App Service with a B1 instance, and Azure SQL Basic with a 5Gb database). For development, you can get this down to about $5/month (just the cost of the database).
Azure API Management (configured in consumption mode) is free (up to 1 million calls per month), so it doesn’t add anything to use Azure API Management from the outset. As you go to production, you can select an appropriate tier for your support and performance requirements. If I find something that just doesn’t work on the consumption tier, I’ll point it out.
You need an Azure Mobile Apps service
I’ve got a service already running in my Azure subscription. It’s the service that is used for testing the Azure Mobile Apps client libraries. I run integration tests on every checkin, so it makes sense to keep it running for my work. You only need to know the internal URI for your Azure Mobile Apps service to get started.
Create an API Management resource
Let’s start by creating an API Management resource.
- Log into the Azure portal.
- Select Create a resource.
- Enter API Management into the search box, and press enter.
- Press Create to start the creation wizard.
-
Fill in the basics:
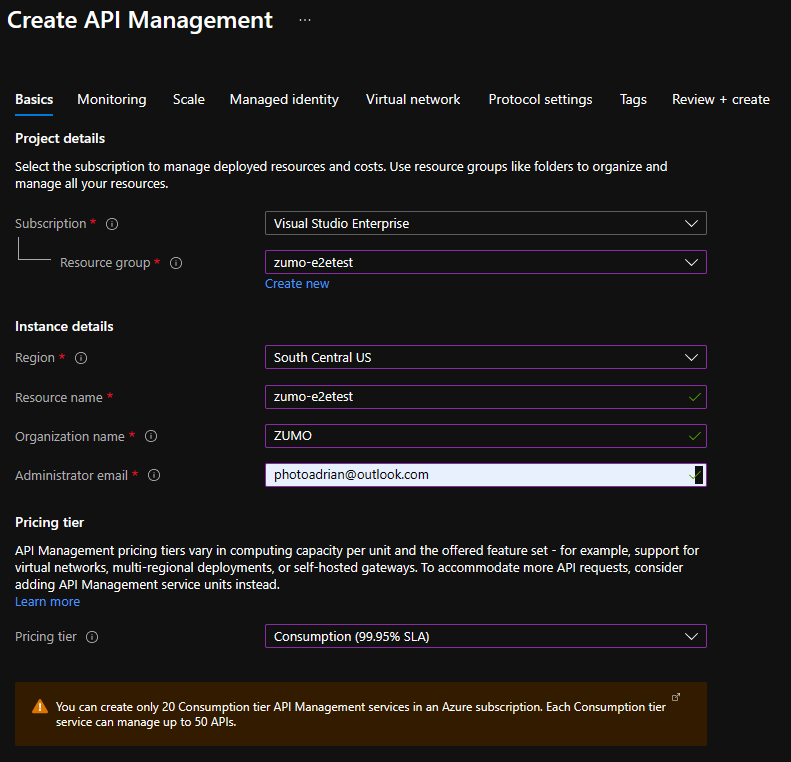
- Press Review + Create at the bottom of the page.
- Press Create at the bottom of the page.
As with all deployments, it can take a while. You can monitor progress in the alerts section and by selecting the deployment (which was opened for you). Don’t continue until the deployment is complete.
Add your backend service
When you create an API Management resource, you are creating a “shell” that you need to fill with your APIs. Those APIs can come from several different backend services. I’ve only got the one service right now, and I don’t want to expose the entire thing. Let’s see how to do that.
If you’ve just finished the deployment, click on Go to resource. If you came back later, you can select your resource group, or just type in API in the top search bar to find it. However you get there, you will see something like this:
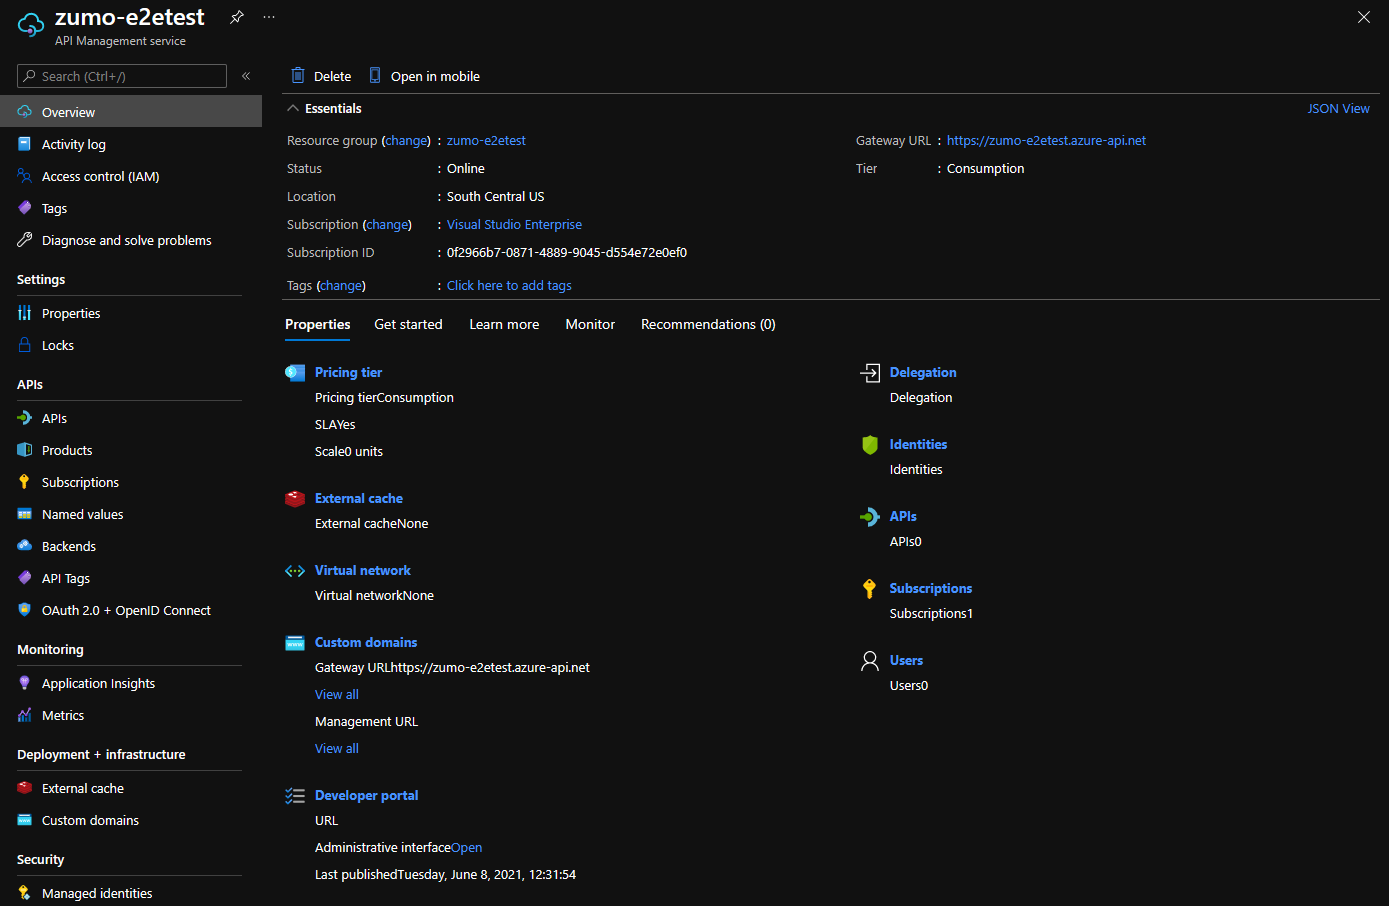
There are multiple ways that you can create an API definition - from a Swagger file, or a function app, or by entering information manually. I’m going to create an API for an App Service.
- From the sidebar, select APIs.
- Under Create from Azure resource, select the App Service box.
- Press Browse, then select your Azure Mobile Apps service.
-
Enter the rest of the information:
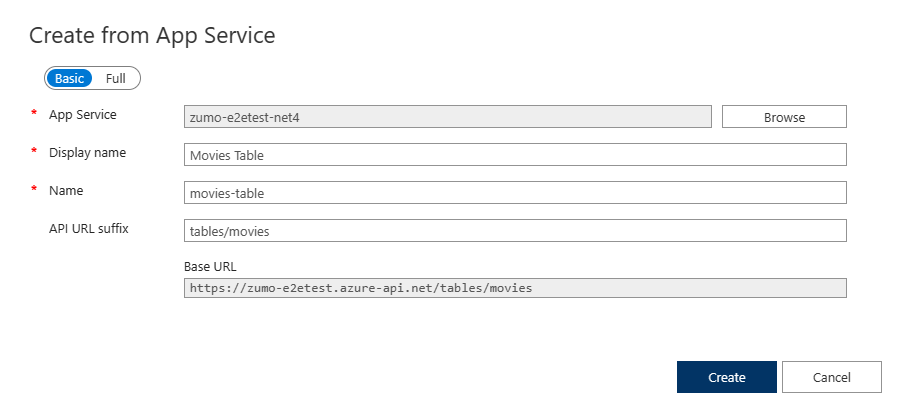
- Press Create.
You will see that a lot of the information has been filled in for you:
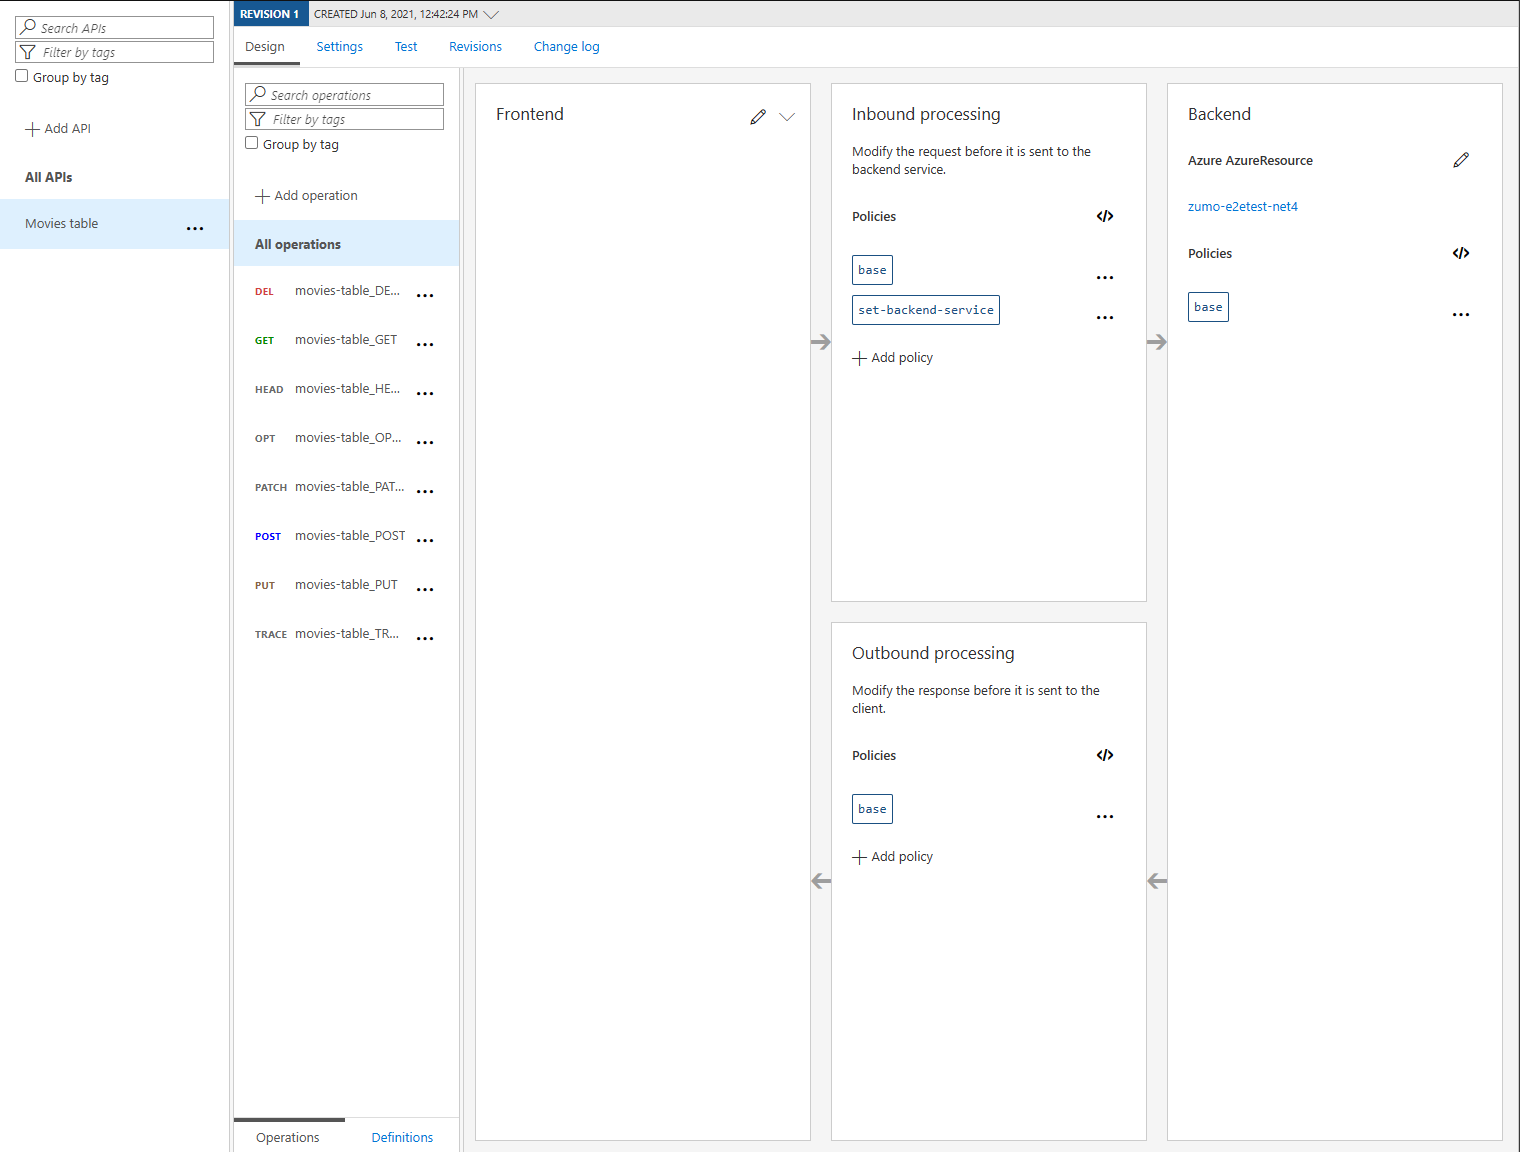
Azure Mobile Apps is a REST/OData service that is optimizes for data synchronization. As such, it supports quite a few operations, but the APIM import creates more than you need. The service does not need the HEAD, OPT, or TRACE options. You can delete them by clicking on the triple-dots next to the operation, then selecting Delete. This will give you the five methods that are in use.
We’ll get into editing policies, including why and how, in another blog post. For now, just know that policies allow you to validate and change the request and response as it goes through API Management.
You can also do some basic editing on each operation by clicking the edit (pencil) icon in the Frontend box. For example, I decided to rename the operations here.
Test your API
Select the GET operation, then click over to the Test tab. You should be able to test your API from within the service just by clicking send - it will send a “query for all” request to the service. If your App Service is on the Free or Shared plans, remember there is an initial startup process.
Guess what - it didn’t work!
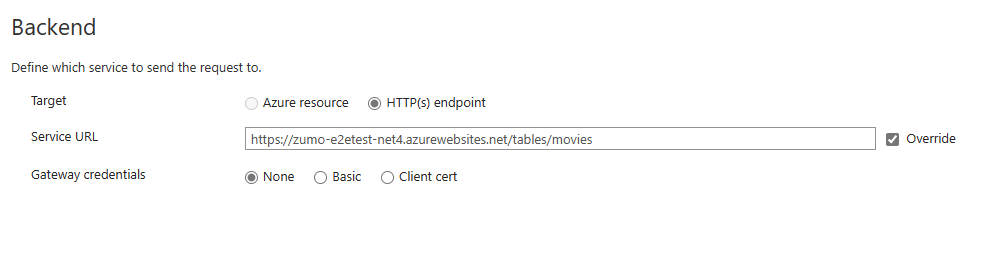
The main reason is because there isn’t a 1:1 mapping between the inbound Uri and the outbound Uri to the Azure Mobile Apps service. In this case, I’ve defined everything so that https://whatever.azure-api.net/tables/movies (the API I’ve set up in APIM) points to https://myservice.azurewebsites.net/ (the root of the App Service). I can correct this one of two ways. Firstly, I can switch the backend resource from an Azure service to a HTTP Uri. This is, perhaps, the easiest, especially since I don’t want to get into policies just yet.
To do that, press the edit (pencil) icon in the Backend box.
- Change the target to HTTP(s) endpoint.
- Check the Override checkbox.
- Enter the full Uri of your table - including the
/tables/tableNamebit: - Press Save.
When you test the API now, you will get the regular warning about not having a ZUMO-API-VERSION. You can add this as a header to the request. Once this is done, you will see all the headers and the content of the request.
When using the
/tables/moviestable from the integration tests, only the read operations are available. You don’t need to specify any other operations - just the ones you want to be available externally. For example, you could block the DELETE operation - it will still be available internally to Azure services, but not to mobile clients.
Make the API available
There are a couple more things I need to do before I turn my attention to the mobile app. Firstly, API Management is designed for an API economy, where enterprises advertise and potentially sell access to the APIs. It’s a suitable front door for the APIs we all use for accessing weather data, for example. I am not using any of those. If I send a request to the API from outside the confines of Azure, I will be told I am missing a subscription key. Let’s get rid of that requirement:
- Select the Settings tab.
- Under Subscription, clear the Subscription required check box.
- Press Save.
Within a minute or so, the API will be usable outside. Check this using Postman or a similar testing tool.
Update your mobile app
Irrespective of what language your mobile app is using, you have a definition of the client endpoint. Normally, it will be called something like https://myservice.azurewebsites.net. Instead, you want to set it to https://myapiminstance.azure-api.net. You can find the name listed as the Gateway URL on the Overview page of the API Management resource. Everything else should stay the same.
Next steps
I’ve got a slew of improvements to make to my API using APIM, and I will cover a bunch of them in my next blog post, including setting up API keys and caching - two of the most frequently requested topics.
Until then, happy coding!
Leave a comment