Enterprise Authentication
Enterprise Authentication
Enterprise Authentication is handled by Azure Active Directory, which is fairly commonly configured within Azure. Every Azure subscription has a default directory associated with it that you can leverage for this section. In addition, if your organization has an Office 365 subscription, this will likely be tied to an Azure Active Directory domain to allow enterprise sign-in. In either case, you have a directory you can use for providing authentication to your app.
In general, you will need to get special permissions to update the directory. If you want to use your organizations corporate directory, then you are likely to have to get your IT department involved to set it up.
Azure Active Directory: Server-Flow setup
The Azure Active Directory server-flow is perhaps the easiest of all the authentication methods to configure. No matter if you are doing a client flow or server flow, you need to set up the server flow first.
Tip
We recommend that you implement Client Flow in any non-trivial application.
If you are using your default directory and you want to add a couple of test users, you will need to set those up first. Start by logging in to the Azure portal.
- In the left-hand menu, click More services.
- Enter Active Directory in the search box, then click Azure Active Directory.
- (Optional) If you need to manage a different directory to the default directory, click Switch directory and choose a different directory.
-
Click Users and groups, then All users.
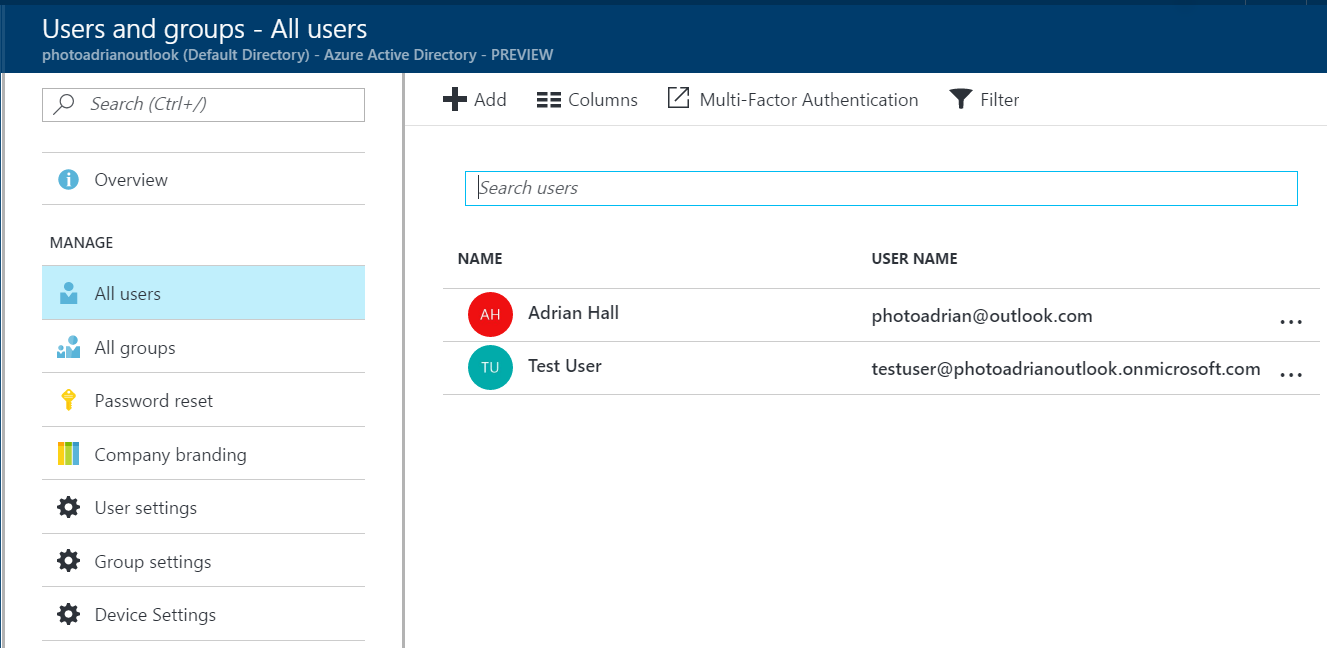
-
Click Add.
-
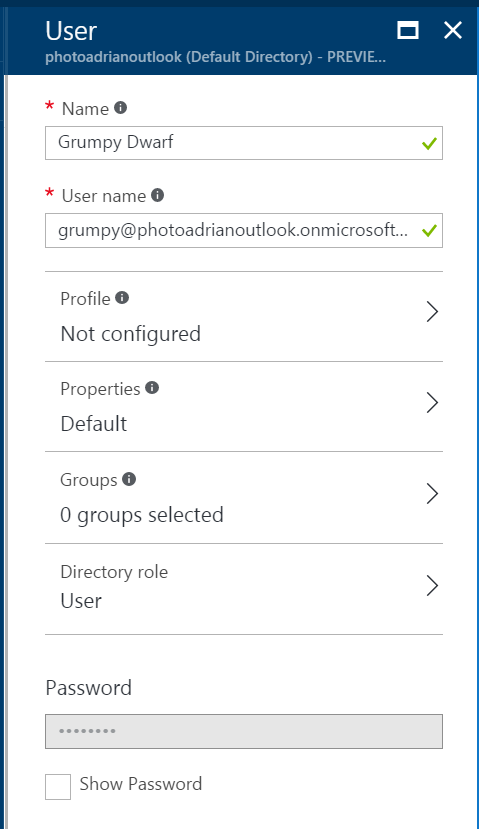
Fill in the information. Ensure you add the user to a group, if necessary. You can also add additional information (like a real name) in the Profile section.
- Check Show Password and make a note of the new password.
- Click Create.
Repeat for each test user you wish to use. Once done, move onto configuring your App Service for authentication:
- Click All resources in the left hand menu.
- Click your App Service or Mobile App.
- Search for and click Authentication / Authorization (it's under SETTINGS).
- Change App Service Authentication to On.
- Ensure the Action to take when request is not authenticated is set to Allow Anonymous requests.
- Click Azure Active Directory.
-
Click Express.
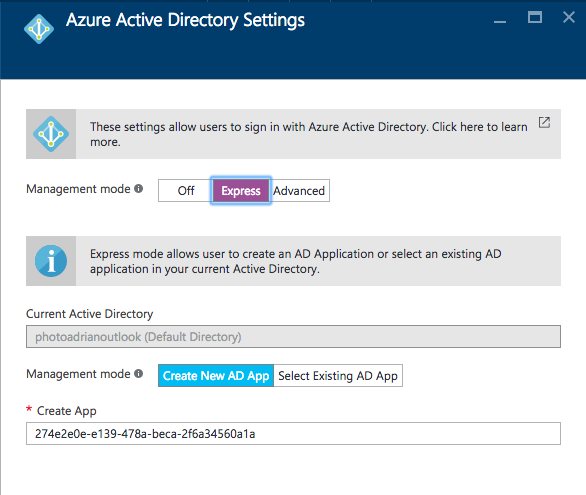
-
All the information is filled in for you. Click OK, then Save.
Info
Make sure you create the app service in the right directory / subscription. If you have access to more than one directory, you can choose the right one by selecting it under your account drop-down in the top-right corner.
There is also an Advanced track. This is used in client-flow situations and in situations where you have more than one directory. It's also used if you want to use the newer MSAL library for authentication. The Express flow is great for getting started quickly.
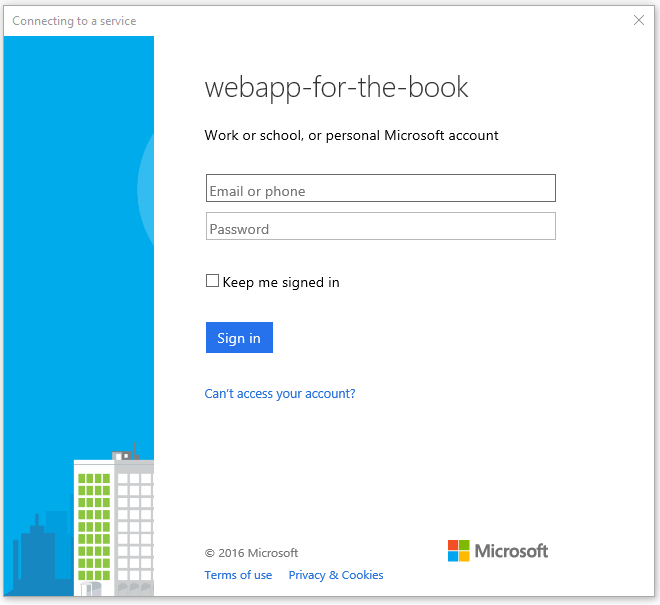
You can walk through a server-flow authentication to test that you have all the settings correct. Point your browser at https://yoursite.azurewebsites.net/.auth/login/aad. The browser will take you through an authentication flow before giving you a successful authentication image:
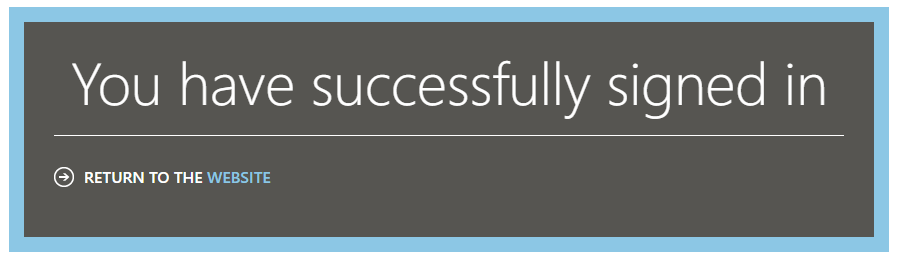
If you get an error akin to "We are having problems signing you in", use an Incognito or InPrivate browsing window.
Adding Authentication to a Mobile Client
Now that the backend is completely configured, we can move our attention to the mobile client. We are going to be using the same mobile client that we developed in the first chapter, but we are now going to add authentication to it. Web views are one of those items that are platform dependent. Fortunately for us, Xamarin has already thought of this and provided a facility for running platform specific code called the DependencyService.
Info
If we run our application right now, clicking on the "Enter the App" button will result in an error. We will be able to see the Unauthorized error in the debug window of Visual Studio.
Our first step is to define an Abstractions\ILoginProvider.cs interface within the shared project:
using Microsoft.WindowsAzure.MobileServices;
using System.Threading.Tasks;

namespace TaskList.Abstractions
{
    public interface ILoginProvider
    {
        Task LoginAsync(MobileServiceClient client);
    }
}
Next, we are going to extend our Abstractions\ICloudService.cs interface so that the main application can call
the login routine:
using System.Threading.Tasks;

namespace TaskList.Abstractions
{
    public interface ICloudService
    {
        ICloudTable<T> GetTable<T>() where T : TableData;

        Task LoginAsync();
    }
}
Our code will call LoginAsync() in the ICloudService, which will get the platform-specific version of the
login provider and call LoginAsync() there, but with our defined mobile service client. That is defined in the
Services\AzureCloudService.cs class:
using System.Threading.Tasks;
using Microsoft.WindowsAzure.MobileServices;
using TaskList.Abstractions;
using TaskList.Helpers;
using Xamarin.Forms;

namespace TaskList.Services
{
    public class AzureCloudService : ICloudService
    {
        MobileServiceClient client;

        public AzureCloudService()
        {
            client = new MobileServiceClient(Locations.AppServiceUrl);
        }

        public ICloudTable<T> GetTable<T>() where T : TableData => new AzureCloudTable<T>(client);

        public Task LoginAsync()
        {
            var loginProvider = DependencyService.Get<ILoginProvider>();
            return loginProvider.LoginAsync(client);
        }
    }
}
The method looks up the platform dependent version of the login provider and executes the login method, passing along the client (which we will need later).
Finally, we will want to easily instantiate the cloud provider. In the shared project, add the following to the
constructor for App.cs:
    public App()
    {
        ServiceLocator.Instance.Add<ICloudService, AzureCloudService>();
        MainPage = new NavigationPage(new Pages.EntryPage());
    }
The ServiceLocator class is used to manage the singletons in an application. The cloud service object can now be retrieved in any view using the following snippet:
ICloudService cloudService = ServiceLocator.Instance.Resolve<ICloudService>();
We will need to do this in the ViewModels/TaskDetailViewModel.cs and ViewModels/TaskKListViewModel.cs classes. Refer to the project in GitHub if you run into issues here.
In each platform-specific project, we need to define a concrete implementation of the login provider that uses a web view to hold the actual authentication flow. Here is the droid Services\DroidLoginProvider.cs (in the
TaskList.Droid project):
using System.Threading.Tasks;
using Android.Content;
using Microsoft.WindowsAzure.MobileServices;
using TaskList.Abstractions;
using TaskList.Droid.Services;

[assembly: Xamarin.Forms.Dependency(typeof(DroidLoginProvider))]
namespace TaskList.Droid.Services
{
    public class DroidLoginProvider : ILoginProvider
    {
        Context context;

        public void Init(Context context)
        {
            this.context = context;
        }

        public async Task LoginAsync(MobileServiceClient client)
        {
            await client.LoginAsync(context, "aad");
        }
    }
}
Let us take a closer look at this implementation. The LoginAsync() method on the Azure Mobile Apps client object takes the Android context (which is normally the main window) and a provider - we can pick any of "facebook", "google", "microsoftaccount", "twitter" or "aad" depending on what we have defined in the Azure App Service. The clever piece is the Xamarin.Forms.Dependency call at the top - that registers the class as a platform service so we can access it through the Xamarin dependency service.
Note that we need an extra initialization routine for Android that must be called prior the login provider being
called to pass along the main window of the app (also known as the context). This is done in the MainActivity.cs
file after the Xamarin Forms initialization call. In addition, Azure Mobile Apps uses Xamarin.Essentials under the covers, and that requires that you handle the callback. The dependency service is not set up until after the Xamarin
Forms library is initialized, so we will not be able to get the login provider reference before that point:
protected override void OnCreate(Bundle bundle)
{
    base.OnCreate(bundle);

    Microsoft.WindowsAzure.MobileServices.CurrentPlatform.Init();

    global::Xamarin.Forms.Forms.Init(this, bundle);

    ((DroidLoginProvider)DependencyService.Get<ILoginProvider>()).Init(this);

    LoadApplication(new App());
}

protected override void OnResume()
{
    base.OnResume();
    Xamarin.Essentials.Platform.OnResume();
}
iOS is similar, but does not require the initialization step in the main startup class. However, it does require handling the callback in the AppDelegate.cs:
public override bool OpenUrl(UIApplication app, NSUrl url, NSDictionary options)
{
    if (Xamarin.Essentials.Platform.OpenUrl(app, url, options)) {
        return true;
    }
    return base.OpenUrl(app, url, options);
}
The login provider class is in Services\iOSLoginProvider.cs (in the TaskList.iOS project):
using System.Threading.Tasks;
using Microsoft.WindowsAzure.MobileServices;
using TaskList.Abstractions;
using TaskList.iOS.Services;
using UIKit;

[assembly: Xamarin.Forms.Dependency(typeof(iOSLoginProvider))]
namespace TaskList.iOS.Services
{
    public class iOSLoginProvider : ILoginProvider
    {
        public async Task LoginAsync(MobileServiceClient client)
        {
            await client.LoginAsync(RootView, "aad");
        }

        public UIViewController RootView => UIApplication.SharedApplication.KeyWindow.RootViewController;
    }
}
Note that we are using the same pattern here for registering the concrete implementation with the dependency service,
so we can get it the same way. Finally, here is the UWP Services\UWPLoginProvider.cs (in the TaskList.UWP project):
using System.Threading.Tasks;
using Microsoft.WindowsAzure.MobileServices;
using TaskList.Abstractions;
using TaskList.UWP.Services;

[assembly: Xamarin.Forms.Dependency(typeof(UWPLoginProvider))]
namespace TaskList.UWP.Services
{
    public class UWPLoginProvider : ILoginProvider
    {
        public async Task LoginAsync(MobileServiceClient client)
        {
            await client.LoginAsync("aad");
        }
    }
}
Now that we have all the platform-specific login routines registered, we can move on to adding the login routine to
the UI. We have already got a button on the entry page to enter the app. It makes sense to wire up that button so
that it logs us in as well. The Command for the login button is in the ViewModels\EntryPageViewModel.cs:
async Task ExecuteLoginCommand()
{
    if (IsBusy)
        return;
    IsBusy = true;

    try
    {
        var cloudService = ServiceLocator.Instance.Resolve<ICloudService>();
        await cloudService.LoginAsync();
        Application.Current.MainPage = new NavigationPage(new Pages.TaskList());
    }
    catch (Exception ex)
    {
        Debug.WriteLine($"[ExecuteLoginCommand] Error = {ex.Message}");
    }
    finally
    {
        IsBusy = false;
    }
}
Info
The ServiceLocator class is a basic singleton handler. It is available in the Chapter2 project. It
returns the concrete version of the cloud service, just like the Singleton version we defined in Chapter1.
When you run the application, clicking on the "Enter the App" button will now present you with an Authenticate window:
Going through the authentication process will get you to the task list again. If the authentication process fails,
then LoginAsync() will throw an error, which is caught at the ViewModel. Right now, the EntryPageViewModel
does nothing more than print a diagnostic message to the debug window of Visual Studio.
Azure Active Directory: Client-Flow Setup
Configuring Azure Active Directory for client-flow is a three-step process. First, we need to create a WEB application. This represents the resource: in our case, the resource is the Azure Mobile Apps backend. Then we need to create a NATIVE application. This represents the client: in our case, the ADAL (Active Directory Access Library) library will need this information. Finally, we need to give the NATIVE application permission to access the WEB application.
It starts with configuring a server-flow to protect the resource. We've already done that above. Then configure a "Native Application" and give it permissions to the web application:
- Log on to the Azure portal.
- Select Azure Active Directory from the left hand menu.
- Click App registrations.
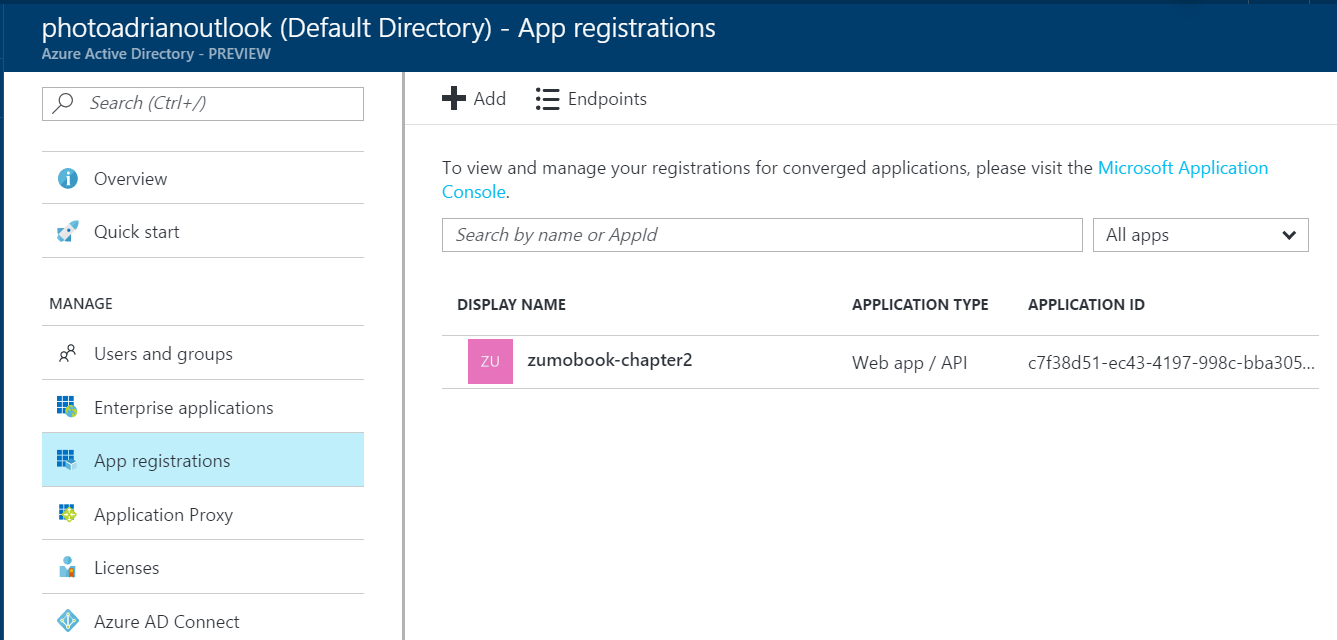
- Note that our existing web application is already there. You will see more applications, depending on what you have set up.
- Click + Add at the top of the page.
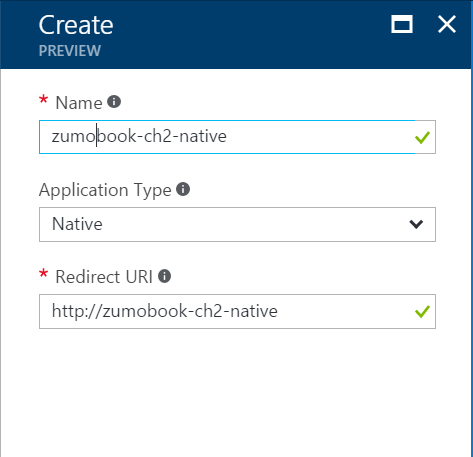
- Enter a name for the app registration. Select Native as the application type. Enter a valid URI in the Redirect URI. It can be anything, but it has to be valid.
- Click Create.
- In the Settings blade, click Redirect URIs.
- Add a Redirect URI of the form:
https://yoursite.azurewebsites.net/.auth/login/done.
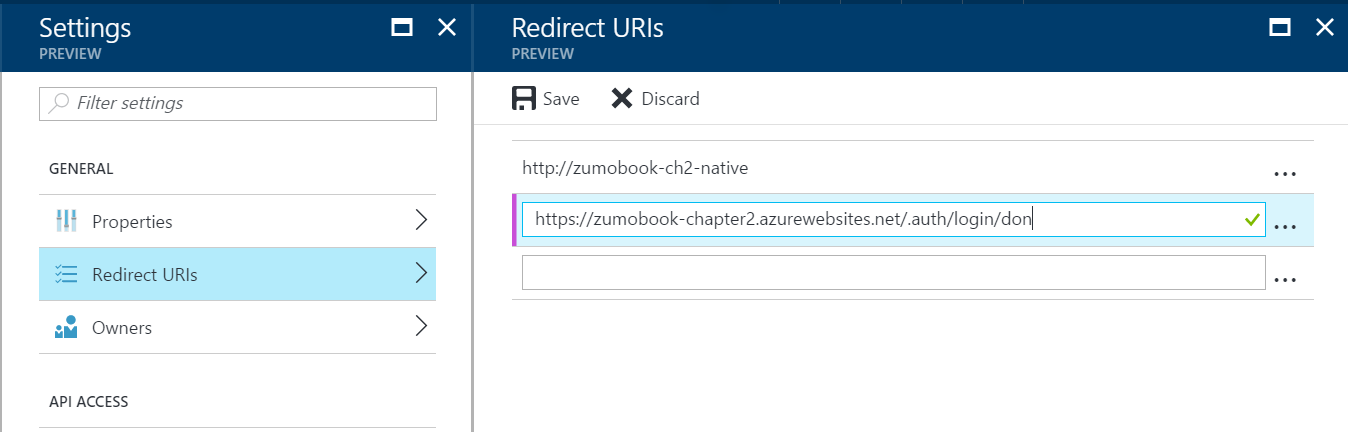
- Click Save.
- Click Required permissions.
- Click + Add.
- Click Select an API.
-
Enter the name of your web application in the search box, and press Enter.
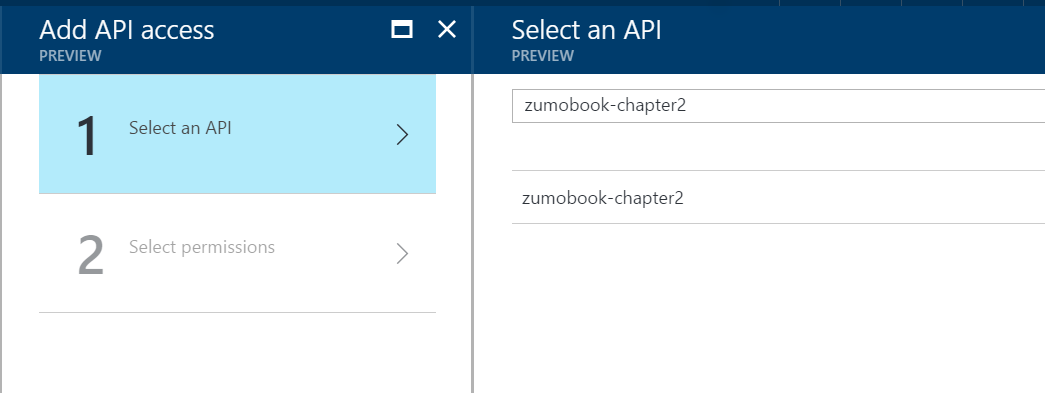
-
Click the name of your web application, then click Select.
-
You will be taken to Select permissions. Click Access your web application
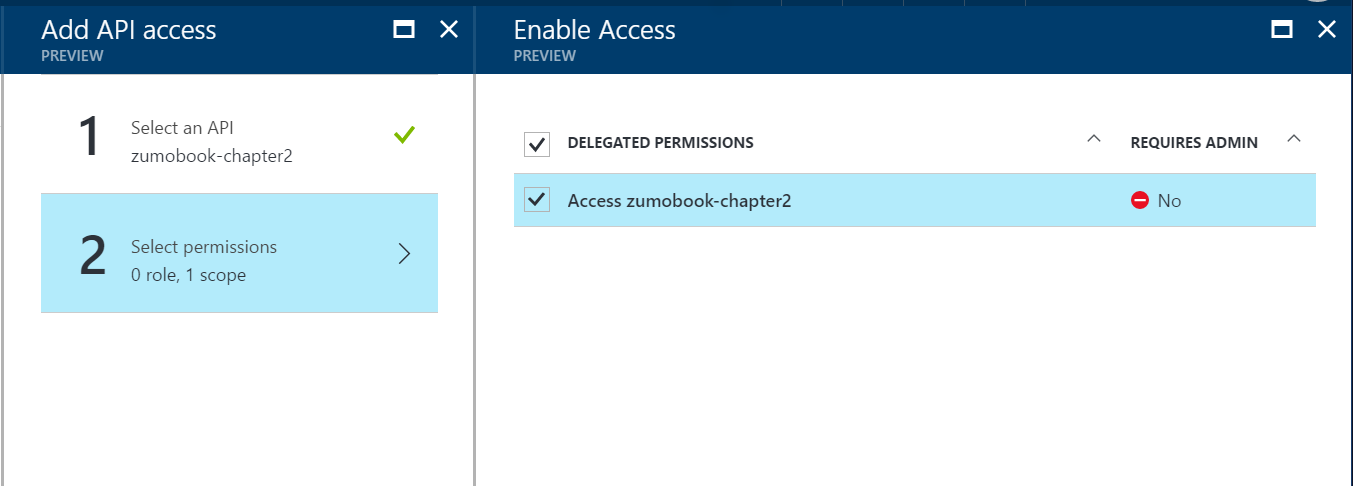
-
Click Select, then Done.
So, what did we just do there? We created a new Azure AD app for the native application. We then gave permission
for the native application to access resources that are protected by the web application. In our Azure App Service, we configured the service so that the Azure AD web application is used to protect our resources. The net effect is that our native application OR our web application can access the App Service resources that are protected via the [Authorize] attribute.
Before continuing, you will need the Application ID and the Redirect URI for the NATIVE application. The Application ID for the native app is available in the Properties section of the Settings blade in the App Registrations blade:
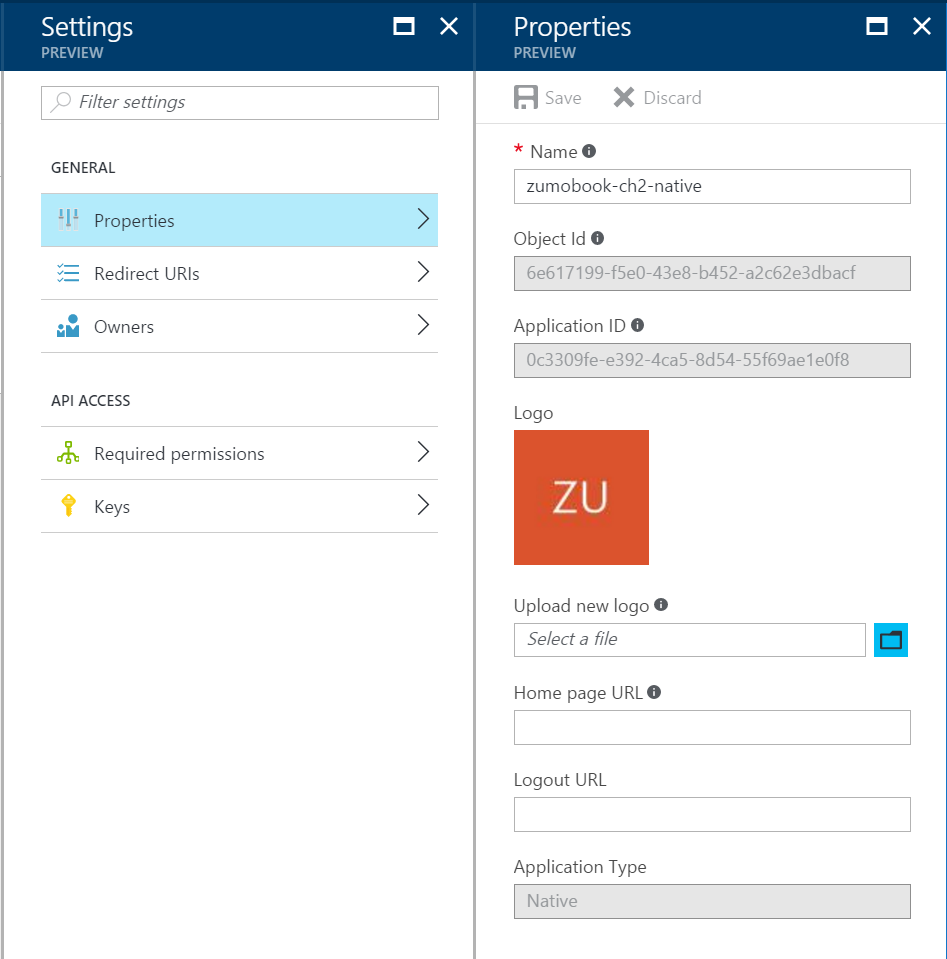
You can enter
these into the Helpers\Locations.cs file in the shared project:
namespace TaskList.Helpers
{
    public static class Locations
    {
        public static readonly string AppServiceUrl = "https://zumobook-chapter2.azurewebsites.net";

        public static readonly string AadClientId = "0c3309fe-e392-4ca5-8d54-55f69ae1e0f8";

        public static readonly string AadRedirectUri = "https://zumobook-chapter2.azurewebsites.net/.auth/login/done";

        public static readonly string AadAuthority = "https://login.windows.net/photoadrianoutlook.onmicrosoft.com";
    }
}
The AadClientId and AadRedirectUri must match what was configured in Azure AD for the native app. The other piece of information we need to add is the Azure AD Authority for the directory. This is available in the Domain names blade within the Azure Active Directory blade.
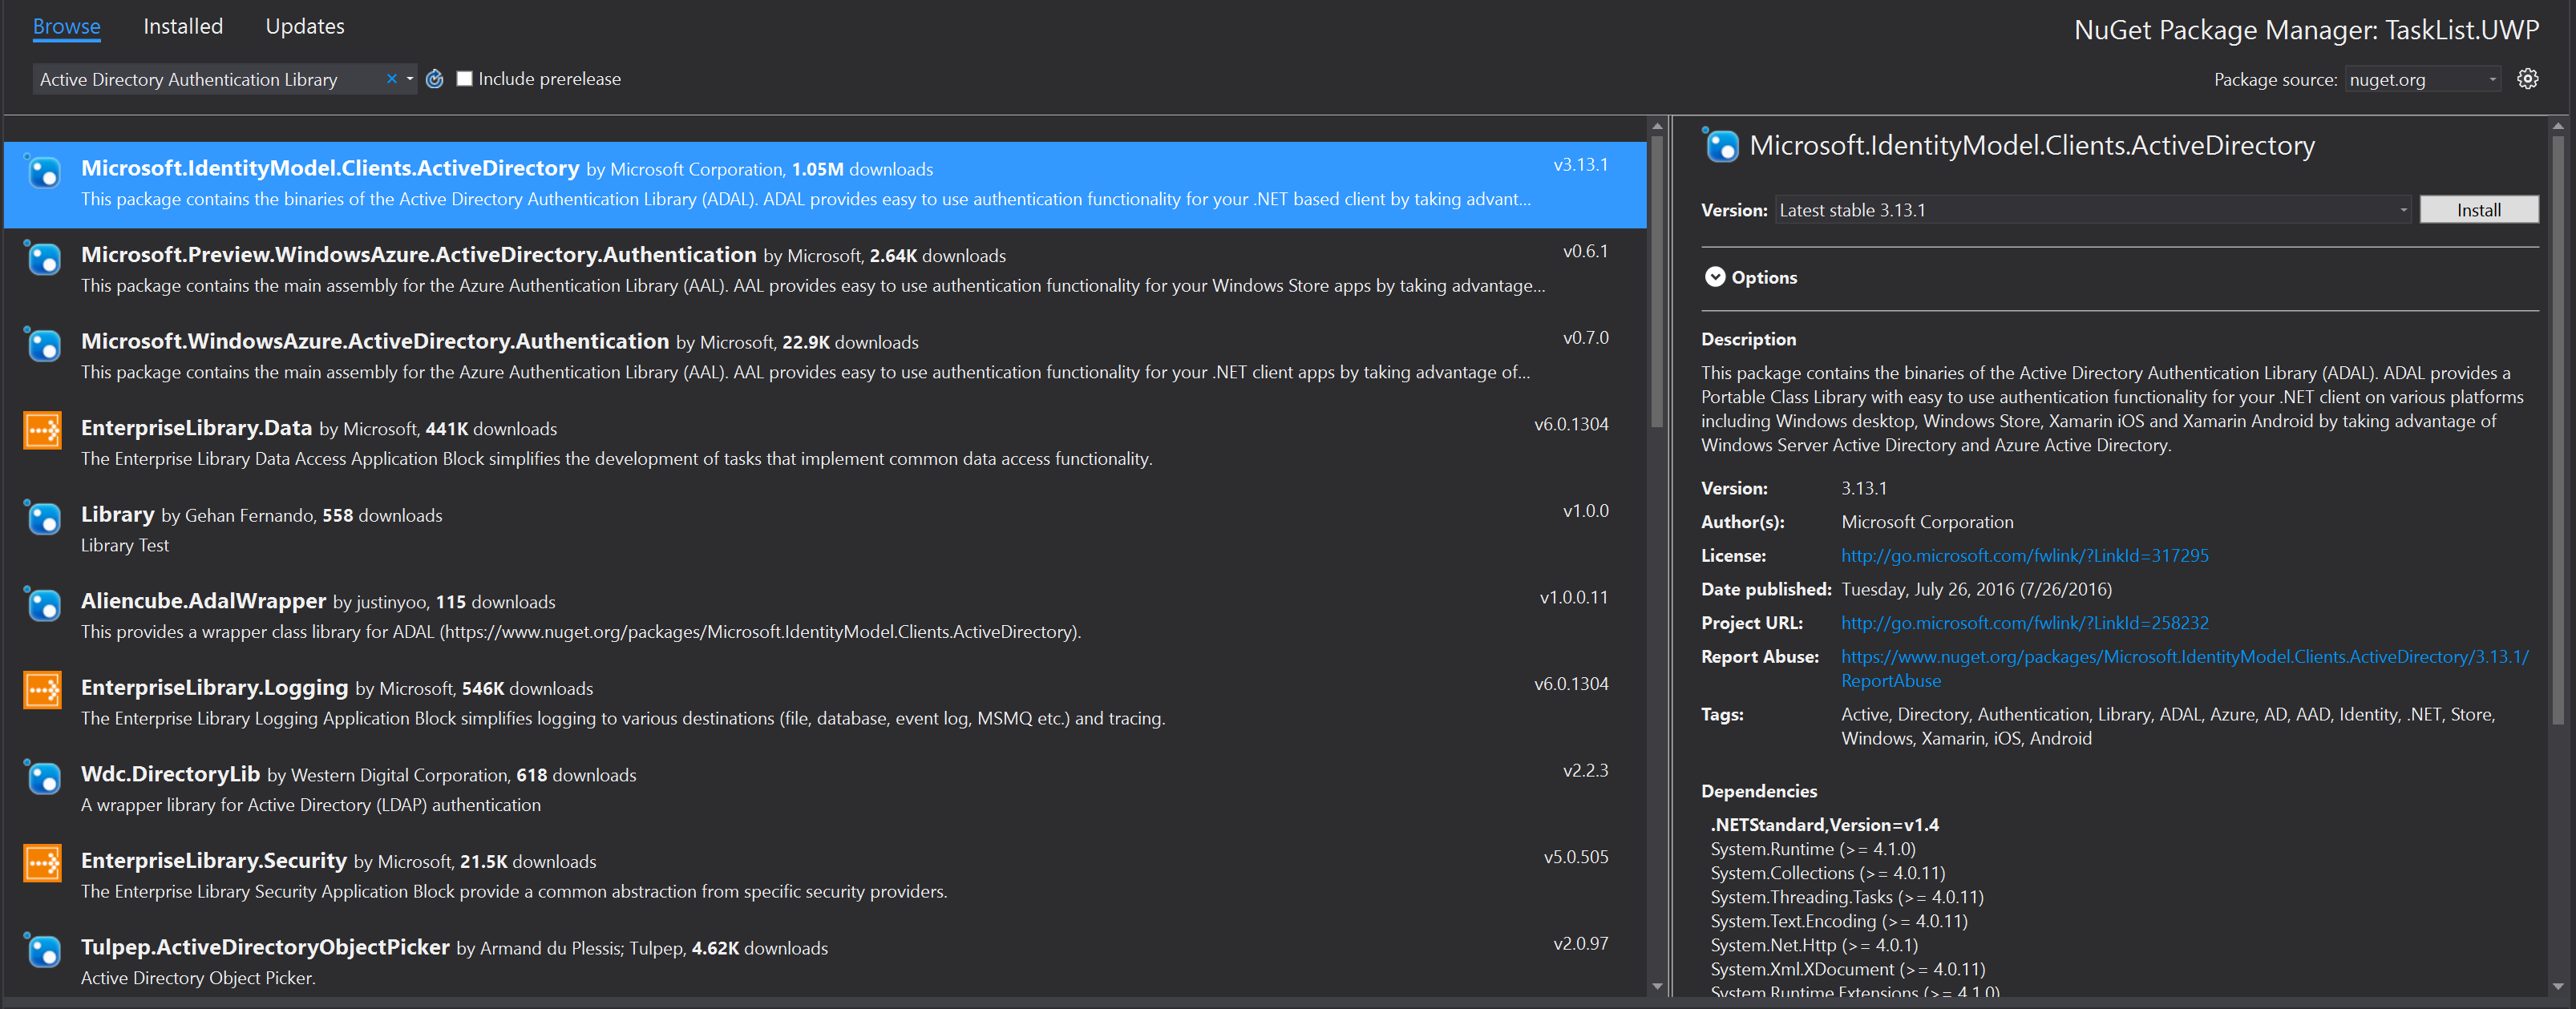
Add the Microsoft.IdentityModel.Clients.ActiveDirectory NuGet package using Manage NuGet Packages... to each platform project. This package contains the ADAL library as a portable class library.
Now you can add the client flow to each project. Start with the login provider in the TaskList.UWP project,
located in the Services\UWPLoginProvider.cs file:
using System;
using System.Linq;
using System.Threading.Tasks;
using Microsoft.IdentityModel.Clients.ActiveDirectory;
using Microsoft.WindowsAzure.MobileServices;
using Newtonsoft.Json.Linq;
using TaskList.Abstractions;
using TaskList.Helpers;
using TaskList.UWP.Services;

[assembly: Xamarin.Forms.Dependency(typeof(UWPLoginProvider))]
namespace TaskList.UWP.Services
{
    public class UWPLoginProvider : ILoginProvider
    {

        /// <summary>
        /// Login via ADAL
        /// </summary>
        /// <returns>(async) token from the ADAL process</returns>
        public async Task<string> LoginADALAsync()
        {
            Uri returnUri = new Uri(Locations.AadRedirectUri);

            var authContext = new AuthenticationContext(Locations.AadAuthority);
            if (authContext.TokenCache.ReadItems().Count() > 0)
            {
                authContext = new AuthenticationContext(authContext.TokenCache.ReadItems().First().Authority);
            }
            var authResult = await authContext.AcquireTokenAsync(
                Locations.AppServiceUrl, /* The resource we want to access  */
                Locations.AadClientId,   /* The Client ID of the Native App */
                returnUri,               /* The Return URI we configured    */
                new PlatformParameters(PromptBehavior.Auto, false));
            return authResult.AccessToken;
        }


        public async Task LoginAsync(MobileServiceClient client)
        {
            // Client Flow
            var accessToken = await LoginADALAsync();
            var zumoPayload = new JObject()
            {
                ["access_token"] = accessToken
            };
            await client.LoginAsync("aad", zumoPayload);

            // Server-Flow Version
            // await client.LoginAsync("aad");
        }
    }
}
The LoginADALAsync() method does the actual client-flow - using the ADAL library to authenticate the user and
return the access token. The LoginAsync() method initiates the client-flow. It uses the token it receives
from the client-flow to log in to the App Service, by packaging the token into a JSON object. I have placed
the client and server flow next to each other so you can compare the two.
In the TaskList.Droid project, we need to deal with the Context, as is common with Android libraries. The
client flow in Services\DroidLoginProvider.cs is remarkably similar though:
using System;
using System.Linq;
using System.Threading.Tasks;
using Android.App;
using Android.Content;
using Microsoft.IdentityModel.Clients.ActiveDirectory;
using Microsoft.WindowsAzure.MobileServices;
using Newtonsoft.Json.Linq;
using TaskList.Abstractions;
using TaskList.Droid.Services;
using TaskList.Helpers;

[assembly: Xamarin.Forms.Dependency(typeof(DroidLoginProvider))]
namespace TaskList.Droid.Services
{
    public class DroidLoginProvider : ILoginProvider
    {
        Context context;

        public void Init(Context context)
        {
            this.context = context;
        }

        /// <summary>
        /// Login via ADAL
        /// </summary>
        /// <returns>(async) token from the ADAL process</returns>
        public async Task<string> LoginADALAsync()
        {
            Uri returnUri = new Uri(Locations.AadRedirectUri);

            var authContext = new AuthenticationContext(Locations.AadAuthority);
            if (authContext.TokenCache.ReadItems().Count() > 0)
            {
                authContext = new AuthenticationContext(authContext.TokenCache.ReadItems().First().Authority);
            }
            var authResult = await authContext.AcquireTokenAsync(
                Locations.AppServiceUrl, /* The resource we want to access  */
                Locations.AadClientId,   /* The Client ID of the Native App */
                returnUri,               /* The Return URI we configured    */
                new PlatformParameters((Activity)context));
            return authResult.AccessToken;
        }

        public async Task LoginAsync(MobileServiceClient client)
        {
            // Client Flow
            var accessToken = await LoginADALAsync();
            var zumoPayload = new JObject();
            zumoPayload["access_token"] = accessToken;
            await client.LoginAsync("aad", zumoPayload);

            // Server-Flow Version
            // await client.LoginAsync(context, "aad");
        }
    }
}
The only real difference between this one and the Universal Windows edition is the PlatformParameters. We need to
pass in the context of the MainActivity (which is passed in through the Init() call). However, we must also handle
the response from the ADAL library. This is done in MainActivity.cs. Add the following method to the MainActivity
class:
protected override void OnActivityResult(int requestCode, Result resultCode, Intent data)
{
    base.OnActivityResult(requestCode, resultCode, data);
    AuthenticationAgentContinuationHelper.SetAuthenticationAgentContinuationEventArgs(requestCode, resultCode, data);
}
Finally, the iOS version also requires access to the root view, so its PlatformParameters are also slightly
different. Here is Services\iOSLoginProvider.cs:
using System;
using System.Linq;
using System.Threading.Tasks;
using Microsoft.IdentityModel.Clients.ActiveDirectory;
using Microsoft.WindowsAzure.MobileServices;
using Newtonsoft.Json.Linq;
using TaskList.Abstractions;
using TaskList.Helpers;
using TaskList.iOS.Services;
using UIKit;

[assembly: Xamarin.Forms.Dependency(typeof(iOSLoginProvider))]
namespace TaskList.iOS.Services
{
    public class iOSLoginProvider : ILoginProvider
    {
        /// <summary>
        /// Login via ADAL
        /// </summary>
        /// <returns>(async) token from the ADAL process</returns>
        public async Task<string> LoginADALAsync(UIViewController view)
        {
            Uri returnUri = new Uri(Locations.AadRedirectUri);

            var authContext = new AuthenticationContext(Locations.AadAuthority);
            if (authContext.TokenCache.ReadItems().Count() > 0)
            {
                authContext = new AuthenticationContext(authContext.TokenCache.ReadItems().First().Authority);
            }
            var authResult = await authContext.AcquireTokenAsync(
                Locations.AppServiceUrl, /* The resource we want to access  */
                Locations.AadClientId,   /* The Client ID of the Native App */
                returnUri,               /* The Return URI we configured    */
                new PlatformParameters(view));
            return authResult.AccessToken;
        }

        public async Task LoginAsync(MobileServiceClient client)
        {
            var rootView = UIApplication.SharedApplication.KeyWindow.RootViewController;

            // Client Flow
            var accessToken = await LoginADALAsync(rootView);
            var zumoPayload = new JObject();
            zumoPayload["access_token"] = accessToken;
            await client.LoginAsync("aad", zumoPayload);

            // Server Flow
            //await client.LoginAsync(rootView, "aad");
        }
    }
}
Note that we can balance the needs of each platform by using the dependency service. The code that is unique to the platform is minimized and stored with the platform.
If you aren't interested in social authentication (Facebook, Google, Microsoft or Twitter authentication providers), you can skip the Social Authentication section.