
Build a Blog: Deploy Azure Infrastructure three ways
For most developers, dealing with the infrastructure part of the job is hard. I like to say “give me a database and a web site” and prefer not to get into the other requirements like DNS, security, and multi-region reliability. My web sites and other cloud projects (including this one) are pretty open. So, what’s the minimum I need to know to deploy stuff on Azure? How can I get my project deployed on Azure for development with the minimum of hassle?
This post is part of a sequence showing how to deploy a blog on Azure Static Web Apps:
- Deploying Azure Static Web Apps
- Configuring Azure DNS
- Configuring Static Web Apps Custom Domains
- Taking Static Web Apps to Production
Today, I’m going to look at three ways to deploy the same thing. That “thing” is an Azure Static Web App, which is a great Azure service that lets you easily host a typical static web site (like a blog).
Three ways? Surely, there are more than that! Why, yes - there are. You can use any number of infrastructure as code (IaC) tools, and there are lots of opinions on how to lay out an infrastructure for enterprise use (which I promise to cover in later blog posts). I’m covering the techniques that I normally use when developing code.
When one is developing cloud code, THREE things need to happen to get the code on the cloud:
- Provision the infrastructure.
- Configure the infrastructure to accept the code.
- Deploy the code to the infrastructure.
For the purposes of the walk-through today, I’m using the Jekyll site that I used to build this blog - it’s just deployed on Azure instead of my normal GitHub Pages location.
The infrastructure
For my purposes, I only need one resource - an Azure Static Web App. A static web app is a resource that holds and serves the HTML, CSS, JavaScript, and other assets for a web site. It can be any web site - React, Vue, Angular, Svelte, Solid, Qwik, Next, Nuxt, Nest, or any other HTML/JS web framework. You don’t even need a web framework. Use a static site generator like Jekyll (used to generate this site), Hugo, Docusaurus, Hexo, Vuepress, and many more can be used.
You only need the ability to generate the HTML, CSS, JavaScript, and assets for the web site.
The site is globally available and cached at the edge. You can use GitHub Actions to deploy your code automatically. It’s a zero downtime deployment (i.e. the new site doesn’t take over until all the files are in place for the new site). Once you are ready to go to production, you can upgrade the SKU and add a custom domain without any down time. There are other good things about Azure Static Web Apps (and we’ll discover them as we go along). For now, let’s look at the three ways to get your code running in the cloud.
Method 1: The CLIs
Some people like to have control over every step of the journey. The Azure CLI (and it’s relative - Azure PowerShell) provide access to every single setting available when provisioning the service. You can go through a similar process with the Azure Portal, but I like to live in the CLI.
Prerequisites
I need a few tools. I set up my environment with a devcontainer, so I can pre-install all the tools using the configuration file for the devcontainer. The links provided below are to the installation page for the tool and don’t include any tooling you need to build your application. If you are deploying a Jekyll site, for example, you need to install Ruby and Jekyll before starting as well. However, since you are ready to deploy your code, you’ll likely have those tools installed already.
You will also want to sign in to Azure and select a subscription if you have access to more than one subscription.
Create the resources
First, I want to define some environment variables that define what I am going to name the resources. This saves you from having to type the same names multiple times (with the inherent risk of mistypes). I need two resources - a resource group (a container for related resources) and the static web app resource. I also want to decide on a region:
export RG="my-blog-rg"
export SWA="my-blog"
export REGION="centralus"
This is bash syntax. If you are using PowerShell instead, use the normal $env:ENVNAME="value" format for setting environment variables. Ensure you have access to deploy resources in your chosen region and that your resource types are supported in that region. Static Web Apps only supports five regions at the time of writing this blog.
All resources are created inside a resource group - a container for related resources.
az group create -n $RG -l $REGIONNext, create the
az staticwebapp create -n $SWA -g $RG -l $REGIONConfigure the resources
The static web apps site requires a staticwebapp.config.json file that defines various aspects of the Static Web App site. I don’t actually need anything beyond the basic hosting, so my file is remarkably simple:
{
  "navigationFallback": {
    "rewrite": "/index.html"
  }
}
If you had more complex routing, used authentication, or adjust any of the other configuration elements, then this is the place to do it. For my site, I only need to tell Static Web Apps where the index page that I want to use is located.
Check this file into source code control.
Deploy the code with the SWA CLI
To deploy the code, I’m going to use the Static Web Apps CLI. This is a JavaScript tool that is distributed via npm, so it’s easy to install in the project:
npm add -D @azure/static-web-apps-cli
npx swa init --yes
Don’t forget to add the
package.jsonfile to source code control and ensure thatnode_modulesis added to the.gitignorefile (or equivalent).
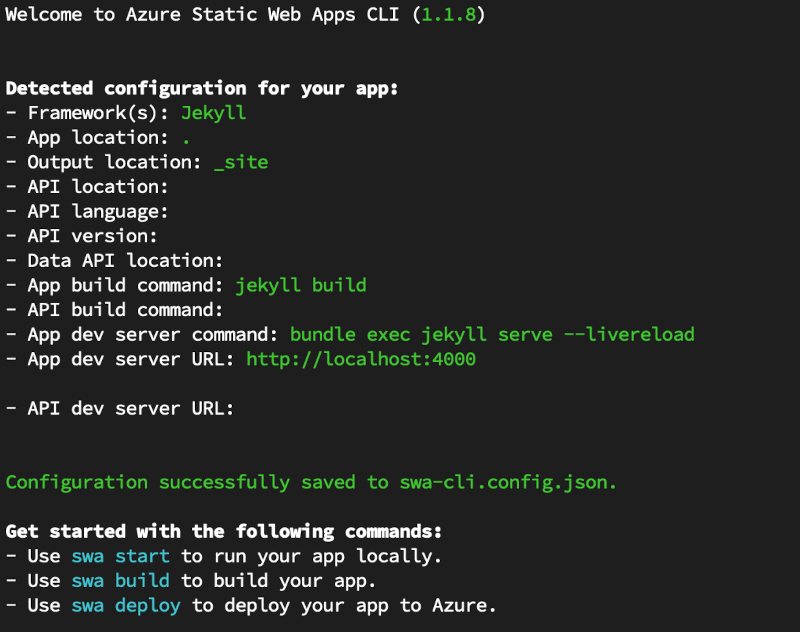
The initialization tries to detect what is application is based on and thus where it can expect the output or distributable files. My build process is bundle exec jekyll build and the files are placed in _site after the build. Check out the output of the swa init command:
The SWA CLI is used to deploy the site to the Static Web Apps resource. First, sign in using the tool:
npx swa login -R $RG -n $SWAYou will be prompted for subscription and tenant information the first time the tool is run. Optionally, you can avoid these prompts by setting environment variables before you run the command. This is useful if you deploy a lot of sites continually, but less useful for a one-off deployment.
export AZURE_SUBSCRIPTION_ID=`az account show --query "id" --output tsv`
export AZURE_TENANT_ID=`az account show --query "tenantId" --output tsv`
I find this is too much typing for an infrequent operation. Mostly, I switch over to one of the other methods after I’ve deployed once, so this is definitely an optional step.
Finally, deploy the code:
npx swa build
npx swa deploy -n $SWA
This will build my site, then deploy the code to the static web app (downloading the tool that actually deploys the code if necessary). Once the deployment is complete, the URL of the site is displayed - I can click on the link to view the site (assuming your terminal app lets you click on links - if not, copy/paste the link into your browser).
Method 2: Azure Developer CLI
While the various CLIs are good enough for one-off deployments, it does require several steps. If I want to hand off my project to someone else, I have to document those steps and the new developer has to know where to look for the documentation. Even if it’s my own site, I have to remember what I did to recreate the site.
Fortunately, Microsoft has a tool that codifies the steps to both provision the site and deploy the code - the Azure Developer CLI is an open-source tool maintained by Microsoft that bundles both an infrastructure deployment and a code deployment in one tool.
To use this tool, you need to:
- Write some bicep code to describe your infrastructure.
- Write an
azure.yamlfile to describe the deployment. - Do any code changes necessary to support the infrastructure.
- Run the
azd upcommand to deploy your code.
If you are developing for Azure on a regular basis, take some time to learn bicep - the IaC language of choice for provisioning resources on Azure.
Once set up, you can just run azd up again whenever you make any changes to either the infrastructure or the code. If you want to bring up a test site with a different name temporarily, just run azd up in a new environment.
I’ll assume you have installed azd already, but that’s the only pre-requisite here.
Write the infrastructure code
All the infrastructure code is created inside an infra folder at the top level of your project. It consists of a main.bicep file to describe the infrastructure, and a main.parameters.json file to adjust the deployment parameters. Let’s take a look at my main.parameters.json file first:
{
  "$schema": "https://schema.management.azure.com/schemas/2019-04-01/deploymentParameters.json#",
  "contentVersion": "1.0.0.0",
  "parameters": {
    "environmentName": {
        "value": "${AZURE_ENV_NAME}"
    },
    "location": {
        "value": "${AZURE_LOCATION}"
    }
  }
}
When azd up runs for the first time, it will ask you for an environment name, subscription ID, and region to use for provisioning resources. These are passed to bicep as environment variables. The main.parameters.json file describes how to turn these environment variables into bicep parameters so that your bicep code can retrieve them. You can also define other variables if you wish and azd will ask you about them as well.
Now, let’s take a look at the bicep code. I’ve removed all the comments from this code so that it reads well inside the blog, but you should definitely comment your code.
1
2
3
4
5
6
7
8
9
10
11
12
13
14
15
16
17
18
19
20
21
22
23
24
25
26
27
28
29
30
targetScope = 'subscription'

@description('The environment name - a unique string that is used to identify THIS deployment.')
param environmentName string

@description('The name of the Azure region that will be used for the deployment.')
param location string

var resourceToken = uniqueString(subscription().subscriptionId, environmentName, location)
var tags = { 'azd-env-name': environmentName }

resource rg 'Microsoft.Resources/resourceGroups@2024-03-01' = {
  name: 'rg-${environmentName}'
  location: location
  tags: tags
}

module swa 'br/public:avm/res/web/static-site:0.3.0' = {
  name: 'swa-${resourceToken}'
  scope: rg
  params: {
    name: 'swa-${environmentName}'
    location: location
    sku: 'Free'
    tags: union(tags, { 'azd-service-name': 'web' })
  }
}

output AZURE_LOCATION string = location
output SERVICE_URL string = 'https://${swa.outputs.defaultHostname}'
Let’s walk through this:
- Line 1 - bicep can operate assuming a subscription level deployment or a resource group deployment. I need a subscription level deployment so that I can create a resource group.
- Lines 3-7 - read in the values from the
main.parameters.json- azd will set these parameters for me. - Line 9 - create a unique string based on the subscription ID, environment name and location. I’ll use this if needed to generate a unique name for a resource or deployment.
- Line 10 - create an object to use for tagging the resources I create.
- Lines 12-16 - create a resource group to hold the resources being created.
- Lines 18-27 - create a static web app inside the resource group with the Free SKU, tagged with a specific service name. This is used later on to find the resource to deploy code to.
- Lines 29-30 - output the things I need to know about the deployment.
I’m using a module from the Azure Verified Modules collection here. Azure Verified Modules (or AVM) is a collection of bicep modules that you can use to help configure your resources. You can consider them “batteries included” modules. They generally cover how to deal with diagnostics, resource locks, role assignments, and private networking in a standardized way across all resource types. I recommend using verified modules in your infrastructure projects if you use bicep as they will significantly reduce the size of your bicep code.
Write an azure.yaml file
The azure.yaml file is used by the Azure Developer CLI to link the resources deployed in the infrastructure step to the code that needs to be deployed on them. You need to give each resources that has code deployed to it a unique name and set the azd-service-name tag to that name. In my case, I’ve tagged my static web app with the name web. Let’s look at the azure.yaml file:
1
2
3
4
5
6
7
8
9
# yaml-language-server: $schema=https://raw.githubusercontent.com/Azure/azure-dev/main/schemas/v1.0/azure.yaml.json

name: apps-on-azure-blog
services:
  web:
    project: .
    dist: _site
    language: js
    host: staticwebapp
The web service (at line 5) corresponds to the service name that I specified in the azd-service-name tag for the resource.
Code changes
As in the first method, you will need to create a staticwebapp.config.json file. I’ve copied the same file here in case you are following the instructions:
{
  "navigationFallback": {
    "rewrite": "/index.html"
  }
}
Deploy the code with the Azure Developer CLI
Finally, I can deploy my code. First, sign in with the Azure Developer CLI:
azd auth loginAnd then run the end-to-end deployment:
azd upYou are prompted for additional information when running this for the first time (the environment name, subscription, and location). You won’t be prompted for these again. The information is stored in a .azure directory within your project.
Method 3: GitHub Actions
For ongoing deployments (like a blog), even one command is one too many. I want to build and deploy my site whenever I write a blog without worrying about the details. I’ve got my code checked into a GitHub repository, so it would be really nice if I had a GitHub Action that deployed my code whenever I checked into the main branch. There are two potential GitHub Actions I can utilize here:
Of these two, I prefer the Azure Developer CLI method. This allows me to set up the deployment first (see Method 2 above) and then add the GitHub Action later on. It also handles my infrastructure deployment and can deploy additional resources (like an Azure Front Door or a database) if necessary. If my code runs into a problem, I can diagnose it outside of the GitHub Actions mechanism
The Static Web Apps Deploy method has the advantage that you don’t need to set up a service principal in Entra ID so that your GitHub Action can communicate with Azure. Instead, you need a deployment token that you can retrieve from the Static Web Apps resource in the Azure portal. You can also set up the deployment from the Azure portal by linking the GitHub repository to your Static Web Apps resource. Finally, you can automatically deploy preview sites based on pull requests, giving you an automatic mechanism for previewing code before it is merged into production.
To set up a GitHub Action, create a file in your repository called .github/workflows/deploy-blog.yml:
1
2
3
4
5
6
7
8
9
10
11
12
13
14
15
16
17
18
19
20
21
22
23
24
25
26
27
28
29
30
31
32
33
34
35
36
37
38
39
40
41
42
43
44
45
46
47
48
49
50
51
52
53
54
55
56
57
58
59
60
61
62
63
64
65
66
67
68
69
70
71
72
73
74
75
76
77
on:
  workflow_dispatch:
  push:
    branches:
      - main

permissions:
  id-token: write
  contents: read

jobs:
  build:
    runs-on: ubuntu-latest
    env:
      AZURE_CLIENT_ID: ${{ vars.AZURE_CLIENT_ID }}
      AZURE_TENANT_ID: ${{ vars.AZURE_TENANT_ID }}
      AZURE_SUBSCRIPTION_ID: ${{ vars.AZURE_SUBSCRIPTION_ID }}
      AZURE_CREDENTIALS: ${{ secrets.AZURE_CREDENTIALS }}
    steps:
      - name: Checkout
        uses: actions/checkout@v4

      - name: Install azd
        uses: Azure/setup-azd@v1.0.0

      - name: Install nodejs
        uses: actions/setup-node@v4
        with:
          node-version: 20

      - name: Install Ruby
        uses: ruby/setup-ruby@v1
        with:
            ruby-version: '3.1.3'
            bundler-cache: true

      - name: Build Site
        run: bundle exec jekyll build
        env:
          JEKYLL_ENV: production

      - name: Log in with Azure (Federated Credentials)
        if: ${{ env.AZURE_CLIENT_ID != '' }}
        run: |
          azd auth login `
            --client-id "$Env:AZURE_CLIENT_ID" `
            --federated-credential-provider "github" `
            --tenant-id "$Env:AZURE_TENANT_ID"
        shell: pwsh

      - name: Log in with Azure (Client Credentials)
        if: ${{ env.AZURE_CREDENTIALS != '' }}
        run: |
          $info = $Env:AZURE_CREDENTIALS | ConvertFrom-Json -AsHashtable;
          Write-Host "::add-mask::$($info.clientSecret)"

          azd auth login `
            --client-id "$($info.clientId)" `
            --client-secret "$($info.clientSecret)" `
            --tenant-id "$($info.tenantId)"
        shell: pwsh
        env:
          AZURE_CREDENTIALS: ${{ secrets.AZURE_CREDENTIALS }}

      - name: Provision Infrastructure
        run: azd provision --no-prompt
        env:
          AZURE_ENV_NAME: ${{ vars.AZURE_ENV_NAME }}
          AZURE_LOCATION: ${{ vars.AZURE_LOCATION }}
          AZURE_SUBSCRIPTION_ID: ${{ vars.AZURE_SUBSCRIPTION_ID }}

      - name: Deploy Application
        run: azd deploy --no-prompt
        env:
          AZURE_ENV_NAME: ${{ vars.AZURE_ENV_NAME }}
          AZURE_LOCATION: ${{ vars.AZURE_LOCATION }}
          AZURE_SUBSCRIPTION_ID: ${{ vars.AZURE_SUBSCRIPTION_ID }}
All GitHub Actions live in the .github/workflows directory of your repository. Let’s go through this file line by line:
- Lines 1-5 dictate when this action will be executed - in this case, either manually or when I push a change to the main branch.
- Lines 7-9 indicate what permissions are required.
- Lines 11-77 are the actual steps needed to deploy the code.
- Lines 13-18 set up the environment for the deployment.
- Lines 20-21 checks out the code.
- Lines 23-35 install tools necessary for the deployment.
- Lines 37-40 build the code for later deployment.
- Lines 42-63 sign in to Azure using the credentials I’ve provided in the environment. There are two versions - one for a service principal and one for federated credentials.
- Lines 65-77 provision the resources, then deploy the code.
Before I can use this action, I need to establish some credentials for Azure in my GitHub repository. Use the following command to establish those credentials:
azd pipeline configThis command will copy your current environment to the GitHub Actions, log into Azure, and store those federated credentials as secrets with the GitHub Action as well. I hope you named your environment the way you wanted to before you ran the command!
The command will ask if you want to push your local changes (say yes) and then it will display the link to the actions. You can (and should) click on the actions link and see if your action was successful.
Clean up resources
If you’ve been following along, you probably don’t want the resources you created to stick around. Even though the Azure Static Web Apps SKU is free, you only have 10 of them and you may want to use it for something else. To clean up the resources, just delete the resource group:
az group delete -n apps-on-azure
azd down
Each command will take a couple of minutes. If you do run azd down, make sure you also disable the GitHub Action in your repository and remove the secrets and variables that were stored alongside it.
Final thoughts
So, which method should you use?
- For one-off deployments and tweaks to existing resources, I reach for the Azure CLI and associated tools. You wouldn’t stress about using the Azure portal either - it’s a one off - the method is really not important.
- For repeatable deployments and continuous deployments via GitHub Actions (or any other pipeline runner, including Azure Pipelines), I use the Azure Developer CLI. It’s a single command to spin up a development environment that is separate from my production environment, and it’s easy to integrate into GitHub Actions.
I’ve now completed the next step in publishing this blog. In the next post, I’ll show how to set up Azure DNS so that my blog has a URL for a domain that I own.
Leave a comment